建立可展開的 FAB
如何實作一個在點擊時可展開為多個按鈕的 FAB。
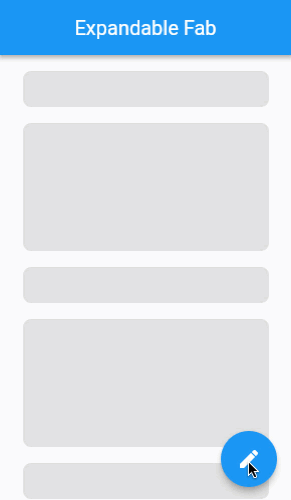
Floating Action Button(FAB,浮動操作按鈕)是一種圓形按鈕, 通常懸浮於內容區域的右下角。 這個按鈕代表對應內容的主要操作(primary action), 但有時候,並不存在單一的主要操作。 相反地,可能有幾個關鍵操作是使用者可能會採取的。 在這種情況下,你可以建立如下圖所示的可展開 FAB。 當按下時,這個可展開 FAB 會產生多個其他操作按鈕。 每個按鈕都對應其中一個關鍵操作。
下方動畫展示了應用程式的行為:
建立 ExpandableFab 元件(Widget)
#
首先,建立一個新的 stateful widget,命名為 ExpandableFab。
這個元件 (Widget) 會顯示主要的 FAB,並協調其他操作按鈕的展開與收合。
此元件會接收幾個參數,包括 ExpandedFab 是否一開始就處於展開狀態、
每個操作按鈕的最大距離,以及一個 children 清單。
稍後你會使用這個清單來提供其他操作按鈕。
@immutable
class ExpandableFab extends StatefulWidget {
const ExpandableFab({
super.key,
this.initialOpen,
required this.distance,
required this.children,
});
final bool? initialOpen;
final double distance;
final List<Widget> children;
@override
State<ExpandableFab> createState() => _ExpandableFabState();
}
class _ExpandableFabState extends State<ExpandableFab> {
@override
Widget build(BuildContext context) {
return const SizedBox();
}
}
FAB 交錯淡入淡出(cross-fade)
#ExpandableFab 在收合時會顯示藍色的編輯按鈕,展開時則顯示白色的關閉按鈕。在展開與收合過程中,這兩個按鈕會彼此縮放並淡入淡出切換。
實作這兩個不同 FAB 之間展開與收合時的交錯淡入淡出效果。
class _ExpandableFabState extends State<ExpandableFab> {
bool _open = false;
@override
void initState() {
super.initState();
_open = widget.initialOpen ?? false;
}
void _toggle() {
setState(() {
_open = !_open;
});
}
@override
Widget build(BuildContext context) {
return SizedBox.expand(
child: Stack(
alignment: Alignment.bottomRight,
clipBehavior: Clip.none,
children: [_buildTapToCloseFab(), _buildTapToOpenFab()],
),
);
}
Widget _buildTapToCloseFab() {
return SizedBox(
width: 56,
height: 56,
child: Center(
child: Material(
shape: const CircleBorder(),
clipBehavior: Clip.antiAlias,
elevation: 4,
child: InkWell(
onTap: _toggle,
child: Padding(
padding: const EdgeInsets.all(8),
child: Icon(Icons.close, color: Theme.of(context).primaryColor),
),
),
),
),
);
}
Widget _buildTapToOpenFab() {
return IgnorePointer(
ignoring: _open,
child: AnimatedContainer(
transformAlignment: Alignment.center,
transform: Matrix4.diagonal3Values(
_open ? 0.7 : 1.0,
_open ? 0.7 : 1.0,
1.0,
),
duration: const Duration(milliseconds: 250),
curve: const Interval(0.0, 0.5, curve: Curves.easeOut),
child: AnimatedOpacity(
opacity: _open ? 0.0 : 1.0,
curve: const Interval(0.25, 1.0, curve: Curves.easeInOut),
duration: const Duration(milliseconds: 250),
child: FloatingActionButton(
onPressed: _toggle,
child: const Icon(Icons.create),
),
),
),
);
}
}
開啟按鈕位於關閉按鈕之上,並包裹在 Stack 中,這樣可以實現視覺上的交錯淡入淡出效果,當頂部的按鈕出現與消失時,看起來就像是交叉淡化。
為了實現交錯淡入淡出的動畫(cross-fade animation),開啟按鈕使用了 AnimatedContainer,搭配縮放(scale)轉換與 AnimatedOpacity。當
ExpandableFab 從收合(collapsed)狀態變為展開(expanded)時,開啟按鈕會縮小並淡出。接著,當 ExpandableFab
從展開(expanded)狀態變為收合(collapsed)時,開啟按鈕會放大並淡入。
你會注意到開啟按鈕外層包了一個 IgnorePointer 元件(Widget)。這是因為開啟按鈕始終存在,即使它是透明的。若沒有 IgnorePointer,開啟按鈕將始終接收點擊事件,即使此時顯示的是關閉按鈕。
建立 ActionButton 元件(Widget)
#
從 ExpandableFab 展開的每個按鈕設計都相同。它們都是藍色圓形,搭配白色圖示。更精確地說,按鈕的背景顏色是 ColorScheme.secondary,圖示顏色則是
ColorScheme.onSecondary。
請定義一個新的無狀態元件(StatelessWidget),命名為 ActionButton,用來顯示這些圓形按鈕。
@immutable
class ActionButton extends StatelessWidget {
const ActionButton({super.key, this.onPressed, required this.icon});
final VoidCallback? onPressed;
final Widget icon;
@override
Widget build(BuildContext context) {
final theme = Theme.of(context);
return Material(
shape: const CircleBorder(),
clipBehavior: Clip.antiAlias,
color: theme.colorScheme.secondary,
elevation: 4,
child: IconButton(
onPressed: onPressed,
icon: icon,
color: theme.colorScheme.onSecondary,
),
);
}
}
將幾個這個新的 ActionButton 元件(Widget)實例,傳遞到你的 ExpandableFab 中。
floatingActionButton: ExpandableFab(
  distance: 112,
  children: [
    ActionButton(
      onPressed: () => _showAction(context, 0),
      icon: const Icon(Icons.format_size),
    ),
    ActionButton(
      onPressed: () => _showAction(context, 1),
      icon: const Icon(Icons.insert_photo),
    ),
    ActionButton(
      onPressed: () => _showAction(context, 2),
      icon: const Icon(Icons.videocam),
    ),
  ],
),
展開與收合動作按鈕
#
當展開時,子 ActionButton 應該從開啟的 FAB 下方飛出。當收合時,子 ActionButton 應該飛回到開啟的 FAB 下方。這個動作需要明確地為每個
ActionButton 設定 (x, y) 位置,並透過 Animation 協調這些 (x, y) 位置隨時間的變化。
引入 AnimationController 與 Animation 來控制各個 ActionButton 展開與收合的速率。
class _ExpandableFabState extends State<ExpandableFab>
with SingleTickerProviderStateMixin {
late final AnimationController _controller;
late final Animation<double> _expandAnimation;
bool _open = false;
@override
void initState() {
super.initState();
_open = widget.initialOpen ?? false;
_controller = AnimationController(
value: _open ? 1.0 : 0.0,
duration: const Duration(milliseconds: 250),
vsync: this,
);
_expandAnimation = CurvedAnimation(
curve: Curves.fastOutSlowIn,
reverseCurve: Curves.easeOutQuad,
parent: _controller,
);
}
@override
void dispose() {
_controller.dispose();
super.dispose();
}
void _toggle() {
setState(() {
_open = !_open;
if (_open) {
_controller.forward();
} else {
_controller.reverse();
}
});
}
}
接下來,新增一個名為 _ExpandingActionButton 的無狀態元件(StatelessWidget),並將此元件設定為對單一 ActionButton
進行動畫與定位。ActionButton 則作為泛型 Widget(稱為 child)傳入。
@immutable
class _ExpandingActionButton extends StatelessWidget {
const _ExpandingActionButton({
required this.directionInDegrees,
required this.maxDistance,
required this.progress,
required this.child,
});
final double directionInDegrees;
final double maxDistance;
final Animation<double> progress;
final Widget child;
@override
Widget build(BuildContext context) {
return AnimatedBuilder(
animation: progress,
builder: (context, child) {
final offset = Offset.fromDirection(
directionInDegrees * (math.pi / 180.0),
progress.value * maxDistance,
);
return Positioned(
right: 4.0 + offset.dx,
bottom: 4.0 + offset.dy,
child: Transform.rotate(
angle: (1.0 - progress.value) * math.pi / 2,
child: child!,
),
);
},
child: FadeTransition(opacity: progress, child: child),
);
}
}
_ExpandingActionButton 最重要的部分是 Positioned 元件(Widget),它會將 child
定位在周圍 Stack 內的特定 (x, y) 座標上。
AnimatedBuilder 會在動畫(Animation)每次變化時,讓 Positioned 元件(Widget)重新建置(rebuild)。
FadeTransition 元件則協調每個 ActionButton 在展開與收合時的顯示與隱藏。
最後,在 ExpandableFab 中使用新的 _ExpandingActionButton 元件,即可完成本練習。
class _ExpandableFabState extends State<ExpandableFab>
with SingleTickerProviderStateMixin {
@override
Widget build(BuildContext context) {
return SizedBox.expand(
child: Stack(
alignment: Alignment.bottomRight,
clipBehavior: Clip.none,
children: [
_buildTapToCloseFab(),
..._buildExpandingActionButtons(),
_buildTapToOpenFab(),
],
),
);
}
List<Widget> _buildExpandingActionButtons() {
final children = <Widget>[];
final count = widget.children.length;
final step = 90.0 / (count - 1);
for (
var i = 0, angleInDegrees = 0.0;
i < count;
i++, angleInDegrees += step
) {
children.add(
_ExpandingActionButton(
directionInDegrees: angleInDegrees,
maxDistance: widget.distance,
progress: _expandAnimation,
child: widget.children[i],
),
);
}
return children;
}
}
恭喜你!你現在已經擁有一個可展開的 FAB(Floating Action Button,浮動操作按鈕)。
互動範例
#執行此應用程式:
- 點擊右下角的 FAB,該按鈕以編輯(Edit)圖示呈現。 它會展開成 3 個按鈕,並且自身會被一個關閉按鈕(以 X 表示)取代。
- 點擊關閉按鈕,可以看到展開的按鈕會飛回原本的 FAB,並且 X 會再次被編輯圖示取代。
- 再次展開 FAB,然後點擊任一個 3 個衛星按鈕中的任意一個,會看到一個對話框,代表該按鈕的動作。
import 'dart:math' as math;

import 'package:flutter/material.dart';

void main() {
  runApp(
    const MaterialApp(
      home: ExampleExpandableFab(),
      debugShowCheckedModeBanner: false,
    ),
  );
}

@immutable
class ExampleExpandableFab extends StatelessWidget {
  static const _actionTitles = ['Create Post', 'Upload Photo', 'Upload Video'];

  const ExampleExpandableFab({super.key});

  void _showAction(BuildContext context, int index) {
    showDialog<void>(
      context: context,
      builder: (context) {
        return AlertDialog(
          content: Text(_actionTitles[index]),
          actions: [
            TextButton(
              onPressed: () => Navigator.of(context).pop(),
              child: const Text('CLOSE'),
            ),
          ],
        );
      },
    );
  }

  @override
  Widget build(BuildContext context) {
    return Scaffold(
      appBar: AppBar(title: const Text('Expandable Fab')),
      body: ListView.builder(
        padding: const EdgeInsets.symmetric(vertical: 8),
        itemCount: 25,
        itemBuilder: (context, index) {
          return FakeItem(isBig: index.isOdd);
        },
      ),
      floatingActionButton: ExpandableFab(
        distance: 112,
        children: [
          ActionButton(
            onPressed: () => _showAction(context, 0),
            icon: const Icon(Icons.format_size),
          ),
          ActionButton(
            onPressed: () => _showAction(context, 1),
            icon: const Icon(Icons.insert_photo),
          ),
          ActionButton(
            onPressed: () => _showAction(context, 2),
            icon: const Icon(Icons.videocam),
          ),
        ],
      ),
    );
  }
}

@immutable
class ExpandableFab extends StatefulWidget {
  const ExpandableFab({
    super.key,
    this.initialOpen,
    required this.distance,
    required this.children,
  });

  final bool? initialOpen;
  final double distance;
  final List<Widget> children;

  @override
  State<ExpandableFab> createState() => _ExpandableFabState();
}

class _ExpandableFabState extends State<ExpandableFab>
    with SingleTickerProviderStateMixin {
  late final AnimationController _controller;
  late final Animation<double> _expandAnimation;
  bool _open = false;

  @override
  void initState() {
    super.initState();
    _open = widget.initialOpen ?? false;
    _controller = AnimationController(
      value: _open ? 1.0 : 0.0,
      duration: const Duration(milliseconds: 250),
      vsync: this,
    );
    _expandAnimation = CurvedAnimation(
      curve: Curves.fastOutSlowIn,
      reverseCurve: Curves.easeOutQuad,
      parent: _controller,
    );
  }

  @override
  void dispose() {
    _controller.dispose();
    super.dispose();
  }

  void _toggle() {
    setState(() {
      _open = !_open;
      if (_open) {
        _controller.forward();
      } else {
        _controller.reverse();
      }
    });
  }

  @override
  Widget build(BuildContext context) {
    return SizedBox.expand(
      child: Stack(
        alignment: Alignment.bottomRight,
        clipBehavior: Clip.none,
        children: [
          _buildTapToCloseFab(),
          ..._buildExpandingActionButtons(),
          _buildTapToOpenFab(),
        ],
      ),
    );
  }

  Widget _buildTapToCloseFab() {
    return SizedBox(
      width: 56,
      height: 56,
      child: Center(
        child: Material(
          shape: const CircleBorder(),
          clipBehavior: Clip.antiAlias,
          elevation: 4,
          child: InkWell(
            onTap: _toggle,
            child: Padding(
              padding: const EdgeInsets.all(8),
              child: Icon(Icons.close, color: Theme.of(context).primaryColor),
            ),
          ),
        ),
      ),
    );
  }

  List<Widget> _buildExpandingActionButtons() {
    final children = <Widget>[];
    final count = widget.children.length;
    final step = 90.0 / (count - 1);
    for (
      var i = 0, angleInDegrees = 0.0;
      i < count;
      i++, angleInDegrees += step
    ) {
      children.add(
        _ExpandingActionButton(
          directionInDegrees: angleInDegrees,
          maxDistance: widget.distance,
          progress: _expandAnimation,
          child: widget.children[i],
        ),
      );
    }
    return children;
  }

  Widget _buildTapToOpenFab() {
    return IgnorePointer(
      ignoring: _open,
      child: AnimatedContainer(
        transformAlignment: Alignment.center,
        transform: Matrix4.diagonal3Values(
          _open ? 0.7 : 1.0,
          _open ? 0.7 : 1.0,
          1.0,
        ),
        duration: const Duration(milliseconds: 250),
        curve: const Interval(0.0, 0.5, curve: Curves.easeOut),
        child: AnimatedOpacity(
          opacity: _open ? 0.0 : 1.0,
          curve: const Interval(0.25, 1.0, curve: Curves.easeInOut),
          duration: const Duration(milliseconds: 250),
          child: FloatingActionButton(
            onPressed: _toggle,
            child: const Icon(Icons.create),
          ),
        ),
      ),
    );
  }
}

@immutable
class _ExpandingActionButton extends StatelessWidget {
  const _ExpandingActionButton({
    required this.directionInDegrees,
    required this.maxDistance,
    required this.progress,
    required this.child,
  });

  final double directionInDegrees;
  final double maxDistance;
  final Animation<double> progress;
  final Widget child;

  @override
  Widget build(BuildContext context) {
    return AnimatedBuilder(
      animation: progress,
      builder: (context, child) {
        final offset = Offset.fromDirection(
          directionInDegrees * (math.pi / 180.0),
          progress.value * maxDistance,
        );
        return Positioned(
          right: 4.0 + offset.dx,
          bottom: 4.0 + offset.dy,
          child: Transform.rotate(
            angle: (1.0 - progress.value) * math.pi / 2,
            child: child!,
          ),
        );
      },
      child: FadeTransition(opacity: progress, child: child),
    );
  }
}

@immutable
class ActionButton extends StatelessWidget {
  const ActionButton({super.key, this.onPressed, required this.icon});

  final VoidCallback? onPressed;
  final Widget icon;

  @override
  Widget build(BuildContext context) {
    final theme = Theme.of(context);
    return Material(
      shape: const CircleBorder(),
      clipBehavior: Clip.antiAlias,
      color: theme.colorScheme.secondary,
      elevation: 4,
      child: IconButton(
        onPressed: onPressed,
        icon: icon,
        color: theme.colorScheme.onSecondary,
      ),
    );
  }
}

@immutable
class FakeItem extends StatelessWidget {
  const FakeItem({super.key, required this.isBig});

  final bool isBig;

  @override
  Widget build(BuildContext context) {
    return Container(
      margin: const EdgeInsets.symmetric(vertical: 8, horizontal: 24),
      height: isBig ? 128 : 36,
      decoration: BoxDecoration(
        borderRadius: const BorderRadius.all(Radius.circular(8)),
        color: Colors.grey.shade300,
      ),
    );
  }
}Unless stated otherwise, the documentation on this site reflects Flutter 3.44.0. Page last updated on 2026-06-14. View source or report an issue.