讓元件淡入淡出
如何讓元件淡入淡出。
UI 開發者經常需要在螢幕上顯示或隱藏元素。 然而,元素在螢幕上快速出現或消失,對最終使用者來說可能會感覺突兀。相反地, 可以透過透明度(opacity)動畫讓元素淡入淡出,帶來更流暢的體驗。
AnimatedOpacity
元件 (Widget) 讓你可以輕鬆實現透明度動畫。
本教學將採用以下步驟:
- 建立一個可淡入淡出的方塊。
- 定義
StatefulWidget。 - 顯示一個切換可見性的按鈕。
- 讓方塊淡入與淡出。
1. 建立一個可淡入淡出的方塊
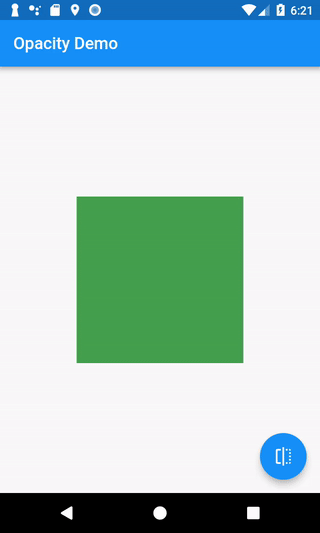
#首先,建立一個可以淡入淡出的物件。本範例會在螢幕上繪製一個綠色方塊。
Container(width: 200, height: 200, color: Colors.green)
2. 定義 StatefulWidget
#
現在你已經有了一個綠色方塊可以進行動畫,
你需要一種方式來判斷這個方塊是否應該顯示。
為了達成這個目的,請使用 StatefulWidget。
StatefulWidget 是一個用來建立 State 物件的類別。
State 物件會保存一些關於應用程式的資料,並提供一種方式來
更新這些資料。在更新資料時,
你也可以要求 Flutter 依據這些變更重新建立 UI。
在這個例子中,你只需要一個資料: 一個布林值(boolean),用來表示按鈕是否可見。
要建立 StatefulWidget,你需要建立兩個類別:一個
StatefulWidget 以及對應的 State 類別。
專業小技巧:Flutter 在 Android Studio 與 VSCode 的外掛中
包含了 stful 程式碼片段,可以快速產生這段程式碼。
// The StatefulWidget's job is to take data and create a State class.
// In this case, the widget takes a title, and creates a _MyHomePageState.
class MyHomePage extends StatefulWidget {
final String title;
const MyHomePage({super.key, required this.title});
@override
State<MyHomePage> createState() => _MyHomePageState();
}
// The State class is responsible for two things: holding some data you can
// update and building the UI using that data.
class _MyHomePageState extends State<MyHomePage> {
// Whether the green box should be visible.
bool _visible = true;
@override
Widget build(BuildContext context) {
// The green box goes here with some other Widgets.
}
}
3. 顯示一個按鈕以切換可見性
#現在你已經有資料來判斷綠色方塊是否應該顯示,接下來需要一個方式來更新這個資料。 在本範例中,如果方塊目前可見,就將其隱藏; 如果方塊目前隱藏,就將其顯示。
為了實現這個功能,請顯示一個按鈕。當使用者按下這個按鈕時,
將布林值從 true 切換為 false,或從 false 切換為 true。
請使用 setState()
來進行這個變更,
這是一個在 State 類別上的方法。
這會通知 Flutter 重新建構元件(Widget)。
如需更多有關處理使用者輸入的資訊, 請參閱 cookbook 的 Gestures 章節。
FloatingActionButton(
  onPressed: () {
    // Call setState. This tells Flutter to rebuild the
    // UI with the changes.
    setState(() {
      _visible = !_visible;
    });
  },
  tooltip: 'Toggle Opacity',
  child: const Icon(Icons.flip),
)
4. 讓方塊淡入淡出
#
你在螢幕上有一個綠色方塊,並有一個按鈕可以切換其可見狀態為 true 或 false。要如何讓方塊淡入與淡出?可以使用 AnimatedOpacity
元件 (Widget)。
AnimatedOpacity 元件需要三個參數:
opacity:一個從 0.0(不可見)到 1.0(完全可見)的值。duration:動畫完成所需的時間長度。child:要進行動畫的元件(Widget),此例中為綠色方塊。
AnimatedOpacity(
  // If the widget is visible, animate to 0.0 (invisible).
  // If the widget is hidden, animate to 1.0 (fully visible).
  opacity: _visible ? 1.0 : 0.0,
  duration: const Duration(milliseconds: 500),
  // The green box must be a child of the AnimatedOpacity widget.
  child: Container(width: 200, height: 200, color: Colors.green),
)
互動範例
#import 'package:flutter/material.dart';
void main() => runApp(const MyApp());
class MyApp extends StatelessWidget {
const MyApp({super.key});
@override
Widget build(BuildContext context) {
const appTitle = 'Opacity Demo';
return const MaterialApp(
title: appTitle,
home: MyHomePage(title: appTitle),
);
}
}
// The StatefulWidget's job is to take data and create a State class.
// In this case, the widget takes a title, and creates a _MyHomePageState.
class MyHomePage extends StatefulWidget {
const MyHomePage({super.key, required this.title});
final String title;
@override
State<MyHomePage> createState() => _MyHomePageState();
}
// The State class is responsible for two things: holding some data you can
// update and building the UI using that data.
class _MyHomePageState extends State<MyHomePage> {
// Whether the green box should be visible
bool _visible = true;
@override
Widget build(BuildContext context) {
return Scaffold(
appBar: AppBar(title: Text(widget.title)),
body: Center(
child: AnimatedOpacity(
// If the widget is visible, animate to 0.0 (invisible).
// If the widget is hidden, animate to 1.0 (fully visible).
opacity: _visible ? 1.0 : 0.0,
duration: const Duration(milliseconds: 500),
// The green box must be a child of the AnimatedOpacity widget.
child: Container(width: 200, height: 200, color: Colors.green),
),
),
floatingActionButton: FloatingActionButton(
onPressed: () {
// Call setState. This tells Flutter to rebuild the
// UI with the changes.
setState(() {
_visible = !_visible;
});
},
tooltip: 'Toggle Opacity',
child: const Icon(Icons.flip),
),
);
}
}
Unless stated otherwise, the documentation on this site reflects Flutter 3.44.0. Page last updated on 2026-06-14. View source or report an issue.