從螢幕返回資料
如何從新螢幕返回資料。
在某些情況下,你可能會希望從新螢幕返回資料。 例如,假設你推送了一個新螢幕,該螢幕向使用者呈現兩個選項。 當使用者點擊其中一個選項時,你希望將使用者的選擇通知給第一個螢幕, 以便它能根據該資訊進行處理。
你可以透過 Navigator.pop()
方法,按照以下步驟來實現:
- 定義主螢幕(home screen)
- 新增一個按鈕來啟動選擇螢幕
- 顯示帶有兩個按鈕的選擇螢幕
- 當按鈕被點擊時,關閉選擇螢幕
- 在主螢幕上以 snackbar 顯示選擇結果
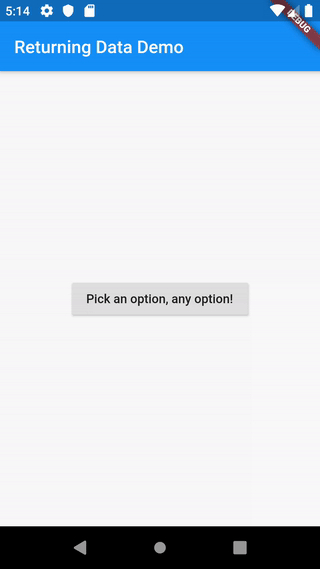
1. 定義主螢幕(home screen)
#主螢幕會顯示一個按鈕。當按鈕被點擊時, 會啟動選擇螢幕。
class HomeScreen extends StatelessWidget {
const HomeScreen({super.key});
@override
Widget build(BuildContext context) {
return Scaffold(
appBar: AppBar(title: const Text('Returning Data Demo')),
// Create the SelectionButton widget in the next step.
body: const Center(child: SelectionButton()),
);
}
}
2. 新增一個按鈕以啟動選擇螢幕
#現在,請建立 SelectionButton,其功能如下:
- 當被點擊時,啟動 SelectionScreen。
- 等待 SelectionScreen 傳回結果。
class SelectionButton extends StatefulWidget {
const SelectionButton({super.key});
@override
State<SelectionButton> createState() => _SelectionButtonState();
}
class _SelectionButtonState extends State<SelectionButton> {
@override
Widget build(BuildContext context) {
return ElevatedButton(
onPressed: () {
_navigateAndDisplaySelection(context);
},
child: const Text('Pick an option, any option!'),
);
}
Future<void> _navigateAndDisplaySelection(BuildContext context) async {
// Navigator.push returns a Future that completes after calling
// Navigator.pop on the Selection Screen.
final result = await Navigator.push(
context,
// Create the SelectionScreen in the next step.
MaterialPageRoute<String>(builder: (context) => const SelectionScreen()),
);
}
}
3. 顯示包含兩個按鈕的選擇螢幕
#現在,建立一個包含兩個按鈕的選擇螢幕。 當使用者點擊其中一個按鈕時, 應用程式會關閉選擇螢幕,並讓主畫面知道使用者點擊了哪一個按鈕。
這個步驟主要定義 UI。 下一步將會加入回傳資料的程式碼。
class SelectionScreen extends StatelessWidget {
const SelectionScreen({super.key});
@override
Widget build(BuildContext context) {
return Scaffold(
appBar: AppBar(title: const Text('Pick an option')),
body: Center(
child: Column(
mainAxisAlignment: MainAxisAlignment.center,
children: [
Padding(
padding: const EdgeInsets.all(8),
child: ElevatedButton(
onPressed: () {
// Pop here with "Yep"...
},
child: const Text('Yep!'),
),
),
Padding(
padding: const EdgeInsets.all(8),
child: ElevatedButton(
onPressed: () {
// Pop here with "Nope"...
},
child: const Text('Nope.'),
),
),
],
),
),
);
}
}
4. 當按鈕被點擊時,關閉選擇螢幕
#
現在,請更新兩個按鈕的 onPressed() 回呼(callback)。
若要將資料傳回到第一個螢幕,
請使用 Navigator.pop()
方法,
該方法可以接受一個名為 result 的可選第二個參數。
任何結果都會傳回給 SelectionButton 中的 Future。
Yep 按鈕
#ElevatedButton(
onPressed: () {
// Close the screen and return "Yep!" as the result.
Navigator.pop(context, 'Yep!');
},
child: const Text('Yep!'),
)
Nope 按鈕
#ElevatedButton(
onPressed: () {
// Close the screen and return "Nope." as the result.
Navigator.pop(context, 'Nope.');
},
child: const Text('Nope.'),
)
5. 在主畫面上以 snackbar 顯示選擇結果
#現在你已經能夠啟動選擇螢幕並等待結果回傳, 你可能會想要對回傳的資訊做一些處理。
在這個例子中,可以使用 _navigateAndDisplaySelection() 方法於 SelectionButton 中,
以 snackbar 顯示該結果:
// A method that launches the SelectionScreen and awaits the result from
// Navigator.pop.
Future<void> _navigateAndDisplaySelection(BuildContext context) async {
// Navigator.push returns a Future that completes after calling
// Navigator.pop on the Selection Screen.
final result = await Navigator.push(
context,
MaterialPageRoute<String>(builder: (context) => const SelectionScreen()),
);
// When a BuildContext is used from a StatefulWidget, the mounted property
// must be checked after an asynchronous gap.
if (!context.mounted) return;
// After the Selection Screen returns a result, hide any previous snackbars
// and show the new result.
ScaffoldMessenger.of(context)
..removeCurrentSnackBar()
..showSnackBar(SnackBar(content: Text('$result')));
}
互動範例
#import 'package:flutter/material.dart';
void main() {
runApp(const MaterialApp(title: 'Returning Data', home: HomeScreen()));
}
class HomeScreen extends StatelessWidget {
const HomeScreen({super.key});
@override
Widget build(BuildContext context) {
return Scaffold(
appBar: AppBar(title: const Text('Returning Data Demo')),
body: const Center(child: SelectionButton()),
);
}
}
class SelectionButton extends StatefulWidget {
const SelectionButton({super.key});
@override
State<SelectionButton> createState() => _SelectionButtonState();
}
class _SelectionButtonState extends State<SelectionButton> {
@override
Widget build(BuildContext context) {
return ElevatedButton(
onPressed: () {
_navigateAndDisplaySelection(context);
},
child: const Text('Pick an option, any option!'),
);
}
// A method that launches the SelectionScreen and awaits the result from
// Navigator.pop.
Future<void> _navigateAndDisplaySelection(BuildContext context) async {
// Navigator.push returns a Future that completes after calling
// Navigator.pop on the Selection Screen.
final result = await Navigator.push(
context,
MaterialPageRoute<String>(builder: (context) => const SelectionScreen()),
);
// When a BuildContext is used from a StatefulWidget, the mounted property
// must be checked after an asynchronous gap.
if (!context.mounted) return;
// After the Selection Screen returns a result, hide any previous snackbars
// and show the new result.
ScaffoldMessenger.of(context)
..removeCurrentSnackBar()
..showSnackBar(SnackBar(content: Text('$result')));
}
}
class SelectionScreen extends StatelessWidget {
const SelectionScreen({super.key});
@override
Widget build(BuildContext context) {
return Scaffold(
appBar: AppBar(title: const Text('Pick an option')),
body: Center(
child: Column(
mainAxisAlignment: MainAxisAlignment.center,
children: <Widget>[
Padding(
padding: const EdgeInsets.all(8),
child: ElevatedButton(
onPressed: () {
// Close the screen and return "Yep!" as the result.
Navigator.pop(context, 'Yep!');
},
child: const Text('Yep!'),
),
),
Padding(
padding: const EdgeInsets.all(8),
child: ElevatedButton(
onPressed: () {
// Close the screen and return "Nope." as the result.
Navigator.pop(context, 'Nope.');
},
child: const Text('Nope.'),
),
),
],
),
),
);
}
}
Unless stated otherwise, the documentation on this site reflects Flutter 3.44.0. Page last updated on 2026-06-14. View source or report an issue.