焦點與文字欄位 (text fields)
焦點在文字欄位 (text field) 中的運作方式。
當一個文字欄位 (text field) 被選取並且可以接受輸入時,稱為擁有「焦點 (focus)」。 一般來說,使用者會透過點擊來切換焦點到文字欄位,而開發者則可以透過本教學中介紹的方法,以程式方式將焦點移到特定的文字欄位。
管理焦點是建立具有直覺流程表單的基本工具。例如,假設你有一個包含文字欄位的搜尋畫面。當使用者導覽到搜尋畫面時,你可以將焦點設定在搜尋字詞的文字欄位上。如此一來,當畫面顯示時,使用者就能立即開始輸入,而不需要手動點擊文字欄位。
在本教學中,你將學會如何在文字欄位一顯示時就自動給予焦點,以及如何在按下按鈕時將焦點移到文字欄位。
讓文字欄位在顯示時自動取得焦點
#若要讓文字欄位在顯示時自動取得焦點,可以使用 autofocus 屬性。
TextField(
  autofocus: true,
);
如需更多有關處理輸入(Input)與建立文字欄位(text field)的資訊,請參閱 cookbook 的 Forms 章節。
當按下按鈕時聚焦於文字欄位
#有時你可能不希望立即將焦點移到特定的文字欄位(text field),而是需要在之後的某個時間點才讓文字欄位獲得焦點。在實際應用中,你也可能需要在收到 API 回應或驗證錯誤時,將焦點給予特定的文字欄位。
本範例將示範如何在使用者按下按鈕後,讓文字欄位獲得焦點,步驟如下:
- 建立一個
FocusNode。 - 將
FocusNode傳遞給TextField。 - 當按鈕被點擊時,將焦點給予
TextField。
1. 建立 FocusNode
#
首先,建立一個 FocusNode。
使用 FocusNode 來識別 Flutter「焦點樹(focus tree)」中的特定 TextField。這樣你就能在接下來的步驟中將焦點給予該
TextField。
由於 focus node 屬於長生命週期的物件,建議透過 State 物件來管理其生命週期。請依照下列說明,在 State 類別的 initState()
方法中建立 FocusNode 實例,並於 dispose() 方法中進行清理:
// Define a custom Form widget.
class MyCustomForm extends StatefulWidget {
const MyCustomForm({super.key});
@override
State<MyCustomForm> createState() => _MyCustomFormState();
}
// Define a corresponding State class.
// This class holds data related to the form.
class _MyCustomFormState extends State<MyCustomForm> {
// Define the focus node. To manage the lifecycle, create the FocusNode in
// the initState method, and clean it up in the dispose method.
late FocusNode myFocusNode;
@override
void initState() {
super.initState();
myFocusNode = FocusNode();
}
@override
void dispose() {
// Clean up the focus node when the Form is disposed.
myFocusNode.dispose();
super.dispose();
}
@override
Widget build(BuildContext context) {
// Fill this out in the next step.
}
}
2. 將 FocusNode 傳遞給 TextField
#
現在你已經有了 FocusNode,
請在 build() 方法中,將它傳遞給特定的 TextField。
@override
Widget build(BuildContext context) {
  return TextField(focusNode: myFocusNode);
}
3. 當按下按鈕時,讓 TextField 取得焦點
#
最後,當使用者點擊浮動操作按鈕(floating action button)時,讓文字欄位 (text field) 取得焦點。請使用 requestFocus()
方法來執行這個操作。
FloatingActionButton(
  // When the button is pressed,
  // give focus to the text field using myFocusNode.
  onPressed: () => myFocusNode.requestFocus(),
),
互動範例
#import 'package:flutter/material.dart';
void main() => runApp(const MyApp());
class MyApp extends StatelessWidget {
const MyApp({super.key});
@override
Widget build(BuildContext context) {
return const MaterialApp(title: 'Text Field Focus', home: MyCustomForm());
}
}
// Define a custom Form widget.
class MyCustomForm extends StatefulWidget {
const MyCustomForm({super.key});
@override
State<MyCustomForm> createState() => _MyCustomFormState();
}
// Define a corresponding State class.
// This class holds data related to the form.
class _MyCustomFormState extends State<MyCustomForm> {
// Define the focus node. To manage the lifecycle, create the FocusNode in
// the initState method, and clean it up in the dispose method.
late FocusNode myFocusNode;
@override
void initState() {
super.initState();
myFocusNode = FocusNode();
}
@override
void dispose() {
// Clean up the focus node when the Form is disposed.
myFocusNode.dispose();
super.dispose();
}
@override
Widget build(BuildContext context) {
return Scaffold(
appBar: AppBar(title: const Text('Text Field Focus')),
body: Padding(
padding: const EdgeInsets.all(16),
child: Column(
children: [
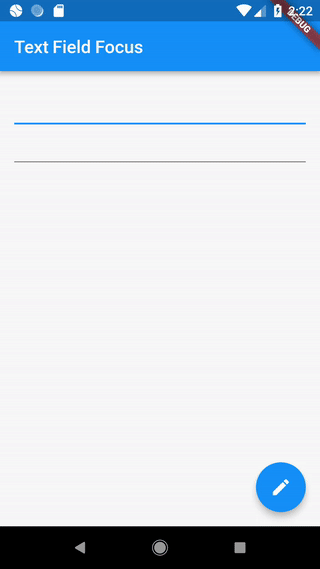
// The first text field is focused on as soon as the app starts.
const TextField(autofocus: true),
// The second text field is focused on when a user taps the
// FloatingActionButton.
TextField(focusNode: myFocusNode),
],
),
),
floatingActionButton: FloatingActionButton(
// When the button is pressed,
// give focus to the text field using myFocusNode.
onPressed: () => myFocusNode.requestFocus(),
tooltip: 'Focus Second Text Field',
child: const Icon(Icons.edit),
), // This trailing comma makes auto-formatting nicer for build methods.
);
}
}
Unless stated otherwise, the documentation on this site reflects Flutter 3.44.0. Page last updated on 2026-06-14. View source or report an issue.